A Simple Introduction to Python and BigQuery for Your Big Data Needs.
I made this product called Pixt, a machine learning platform that delivers actionable info about the emotional value of content. It creates and depends on *a lot of data.*
Posted on Mar 30, 2019
Pixt is,
All kinds of cloud functions, microservices, big data, analytics, and a smidgen of tech-voodoo, in real time.
I was looking to speed up access and delivery of impactful data visualizations, while handing off huge datasets to backend services. To execute hyper-bursty data processes in micro chunks, yet still deliver big data needs in the background.
That sounds complex, but it's not! Here's some context for the Excel warriors out there...
Let's imagine,
that we run a hugely successful e-commerce business.
Over the last 6-months
- We’ve sold 500,000 dresses.
- 10,000 of those were red dresses.
- Cindy purchased two red dresses.
Now, we want to see the seasonal frequency of Cindy’s searches and purchases compared to our other 10 million members.
Because, we want to offer Cindy other red things, right? Like a red bag in the Fall or red boots in Winter, to match her red dress. All at the right time, in the right context (e.g., longtail).
In simple data-speak, a dress is a Thing, red is a Label, and Cindy is a Member.
Get it? Got it? Good.
What we're going to do.
- Get the data using Python.
- Model that data in Pandas to a workable DataFrame.
- Push the DataFrame to our data warehouse.
- Create a Cron job to run scheduled builds.
The point of this exercise is to get a basic understanding of the steps required for setting it all up. So, I'll simplify things by using a single query.
Making a complicated set up as easy as possible.
I landed on Google BigQuery for data warehousing.
When I first started researching how to set up a BigQuery pipeline, it all seemed really complicated. I was scouring the web, finding articles with bits and bobs of information from many different sources.
Through brute force coding, I hacked together a solution that I refined down to the most reliable execution.
This is a real world example, however, I’ve simplified the pipeline to its most basic elements, so you can get the gist and adapt to your own solution.
BigQuery and Python in Three.
I’m going to skip over how to set up a Google Cloud project, because there’s a ton of info out there already. We’ll get started by setting up BigQuery in your Google Cloud console.
1. Enable the API.
First, you need to go here and enable the API in your Google Project
Google has a very clear walkthrough of setting up the environment here.
Once you have the API setup in your project, an option for BigQuery should be present in your console menu. There you'll see a screen like this:
2. Create a DataSet.
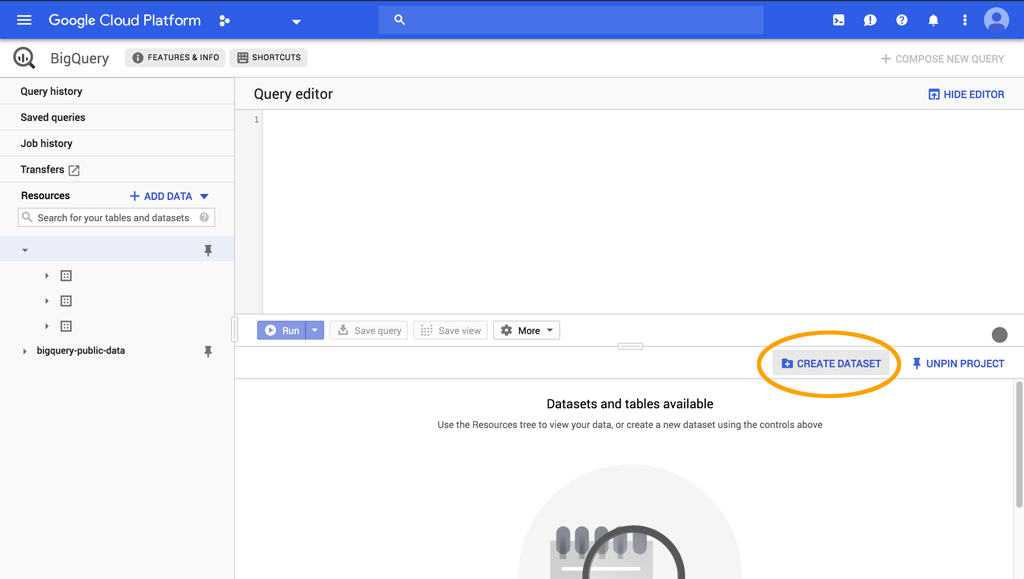
Clicking on the "Create Dataset" button will display this screen:

Name your DataSet, in this case I'm calling it MyDataId, and choose the zone closest to you. For me, I've selected Singapore. Go ahead and click the Create DataSet button to get your first DataSet set up in BigQuery.
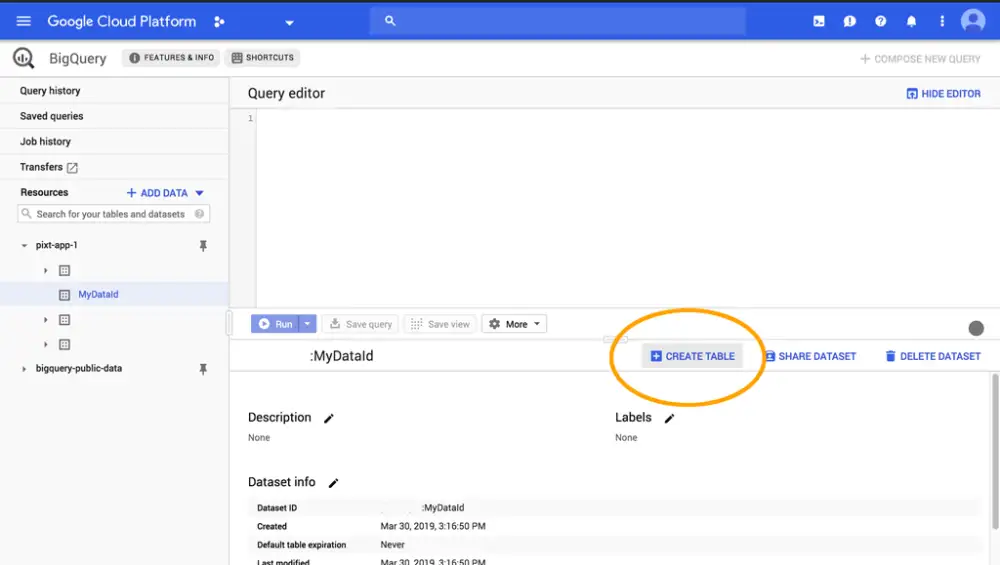
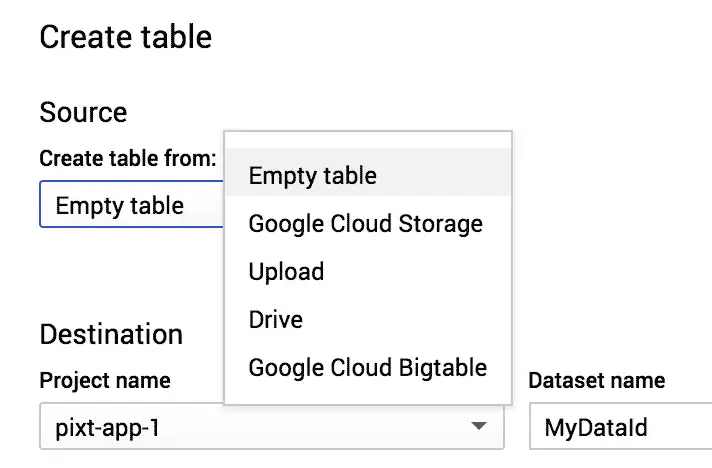
Now that we have a DataSet, we need to add tables to it. To keep things simple, we're going to add only one table. Select your MyDataId, and click Create Table to add a new empty table and call it MyDataTable. Don't worry about other settings at the moment, an empty table that's editable as text works for our case.
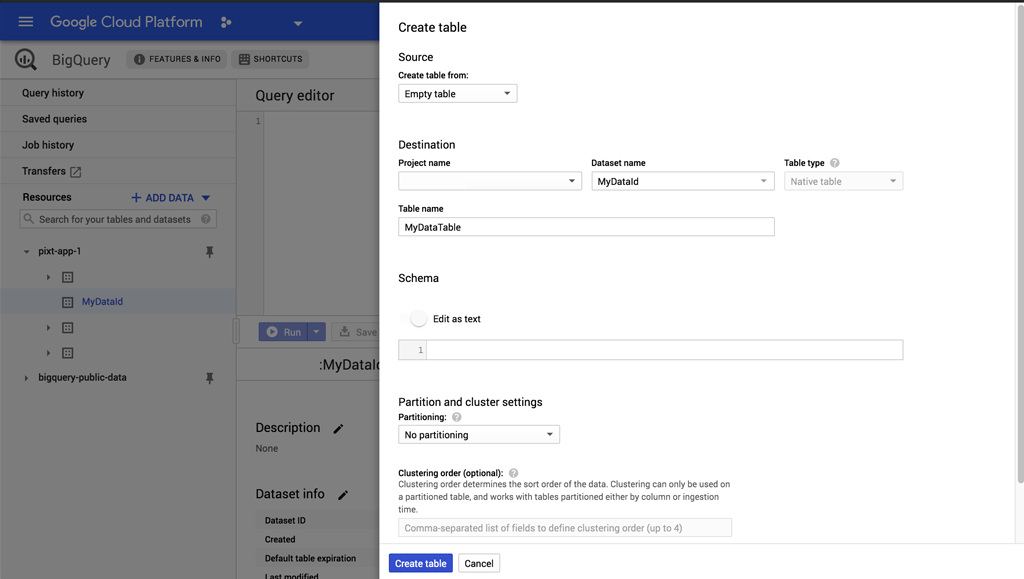
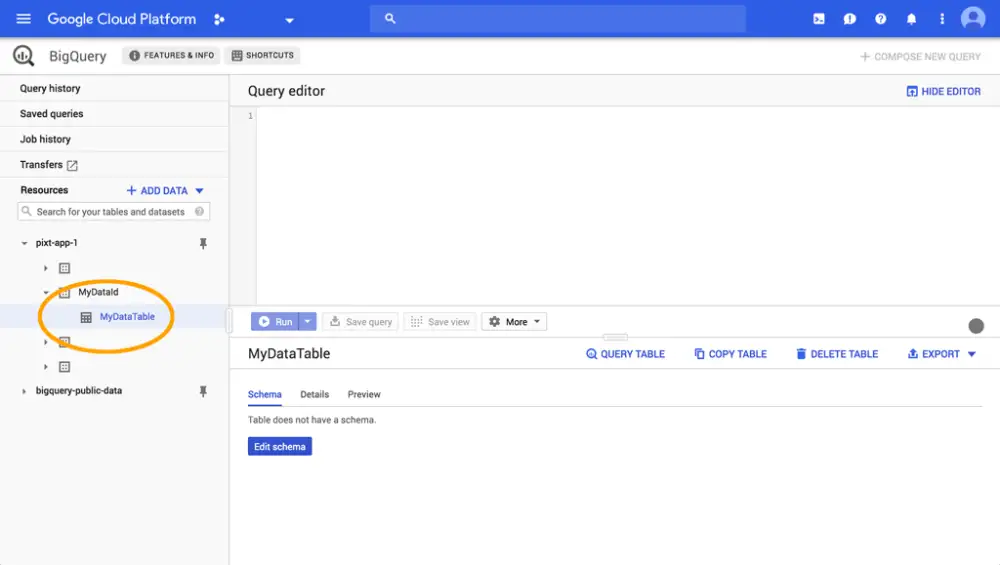
Okay, we now have a DataSet with an empty table set up. We'll be able to reference our table in Python using MyDataId.MyDataTable.
3. Create an API.
I'm using Django Rest Framework to set up my API, but this could be done in any language.
Go to your Django app views.py and create a new function. I'm calling it push_bigquery(). We'll start with creating a queryset for "MyMembers":
from django.db.models import Count
from django.db.models.functions import TruncDate
from django.http import HttpResponse

import pandas as pd
from common.models import MyMembersModel

def push_bigquery(request):
    members_qs = (
        MyMembersModel
        .objects
        .prefetch_related("profile__thing")
        .annotate(
            created_date=TruncDate('profile__thing__timestamp'),
            count=Count('profile__thing')
        )
        .order_by('created_date')
        .distinct()
    ).values('created_date', 'name', 'slug', 'count', 'profile__thing')

members_df = pd.DataFrame(members_qs)
What we've done here is query our MyMembers table and related Things, as values(), which will return a dict-like queryset.
Sidenote, I'm also truncating the timestamp using TruncDate, which casts the expression to a date rather than using the built-in SQL truncate method.
Then we create our Pandas DataFrame from the values with members_df = pd.DataFrame(members_qs)
Basic data modeling.
We're going to do some simple modeling to format our DataFrame. Again, we're keeping this simple, and you already know about formatting data with Pandas.
Add the following to your function:
pd.to_datetime(df['created_date'])
members_df.set_index(df['created_date'], inplace=True)

members_df['count_cumsum'] = members_df['count'].cumsum(axis=0)

members_df['label_cumsum'] = members_df.groupby('name')['count'].cumsum()

members_df['thing_cumsum'] = (
    members_df
    .groupby(df.index)['profile__thing']
    .cumsum()
)

members_df['frequency_of_thing'] = (
    members_df['label_cumsum'] / members_df['thing_cumsum'] * 100
)
Start by converting the created_date series to datetime and set it as index.
Then get the cumulative sum of the number of "things", and cumulative sum of "labels" associated with "things". And, finally the cumulative sum of "things" by each "member".
Yeah, I know that sounds really confusing...
We're doing this because we're looking to get the frequency of things members_df['frequency_of_thing'] by individual members and comparing that to the whole community.
Next, we format our DataFrame by selecting the Series' we want, filtering out any empty (NaN) values and resetting the index:
members_df = members_df[
    ['name', 'slug', 'label_cumsum', 'thing_cumsum', 'frequency_of_thing']
]
members_df = members_df[pd.notnull(df['thing_cumsum'])]
members_df.reset_index(inplace=True)
Okay, our members_df is where we want it so now let's push it to BigQuery.
Google BigQuery as data warehouse.
After all the work we've done so far to set this up, you'll find this part frustratingly simple:
members_df.to_gbq(
    'MyDataId.MyDataTable',
    project_id='your-gcp-project',
    if_exists='replace'
)
That's it.
Really.
We're using Pandas to_gbq to send our DataFrame to BigQuery.
'MyDataId.MyDataTable'references the DataSet and table we created earlier.project_idis the ID of your Google Cloud project.if_existsis set to replace the content of the BigQuery table if the table already exists.
About if_exists.
In this case, if the table already exists in BigQuery, we're replacing all of the data. You don't want to do that in the real world, but this is just an example.
if_exists has a couple of other arguments,
fail, which raises an exception if you try to write to the table, andappendwhich is our preferred option in this case, which will append your data to the existing table.
One other thing.
In my case, not only do I want to push all my data to BigQuery, I also wanted a subset of that data for fast lookups across different services. To do this I used the Python pickle package to serialize the last 3-months of my dataset as a local file, with:
members_df.last('3M').to_pickle('members_df.pkl')Our final function looks like this:
from django.db.models import Count
from django.db.models.functions import TruncDate
from django.http import HttpResponse

import pandas as pd
from common.models import MyMembersModel

def push_bigquery(request):
    members_qs = (
        MyMembersModel
        .objects
        .prefetch_related("profile__thing")
        .annotate(
            created_date=TruncDate('profile__thing__timestamp'),
            count=Count('profile__thing')
        )
        .order_by('created_date')
        .distinct()
      ).values('created_date', 'name', 'slug', 'count', 'profile__thing')

    members_df = pd.DataFrame(members_qs)

    pd.to_datetime(df['created_date'])
    members_df.set_index(df['created_date'], inplace=True)

    members_df['count_cumsum'] = members_df['count'].cumsum(axis=0)

    members_df['label_cumsum'] = members_df.groupby('name')['count'].cumsum()

    members_df['thing_cumsum'] = (
        members_df
        .groupby(df.index)['profile__thing']
        .cumsum()
    )

    members_df['frequency_of_thing'] = (
        members_df['label_cumsum'] / members_df['thing_cumsum'] * 100
    )

    members_df = members_df[
        ['name', 'slug', 'label_cumsum', 'thing_cumsum', 'frequency_of_thing']
    ]
    members_df = members_df[pd.notnull(df['thing_cumsum'])]
    members_df.reset_index(inplace=True)

    members_df.to_gbq(
        'MyDataId.MyDataTable',
        project_id='your-gcp-project',
        if_exists='replace'
    )

    members_df.last('3M').to_pickle('members_df.pkl') # <---RIGHT HERE

    return HttpResponse(status=200)
We could do a bit more optimization with Pandas and Threading, but this is good enough for the purpose of this article.
Google Cloud & Cron jobs.
We're going to set up a Cron job on Google App Engine to run our BigQuery program nightly.
Let's create a url pattern for our push_bigquery view and add it to the app urls.py:
# app/urls.py

from django.conf.urls import url

from . import views

urlpatterns = [

    ... other url patterns ...

    url(
        r'^push-gbq/$',
        views.push_bigquery
    ),
]
Now you should be able to visit http://localhost:8000/push-gbq/ and the function will run, creating the DataFrame, pushing it to BigQuery, and pickeling the last 3-months of your data locally.
To make sure it works, take a look at BigQuery in your Google Cloud Console. You should see your table update with your data. Also, you should see a new .pkl file called "members_df.pkl" in your local project root directory.
Next, in your project root directory, create a file called cron.yaml and add this:
# root/cron.yaml

cron:
- description: "Push GBQ CRON"
  url: /push-gbq/
  schedule: every 24 hours
  retry_parameters:
    min_backoff_seconds: 120
    max_doublings: 5
This creates a Cron job for App Engine that will visit your push_bigquery function at www.your-website/push-gbq/ every 24 hours to push your latest data to BigQuery. Depending on your situation, you'll probably want to change the frequency this runs in your cron.yaml file.
Push the Cron job to App Engine with this terminal command:
gcloud app deploy cron.yaml
Security. Important.
Make sure you set up your function to only accept requests with the x-appengine-cron header!
Now you can deploy your project gcloud app deploy and test your Cron job by clicking the "Run now" button on your Cron page in Google Console.